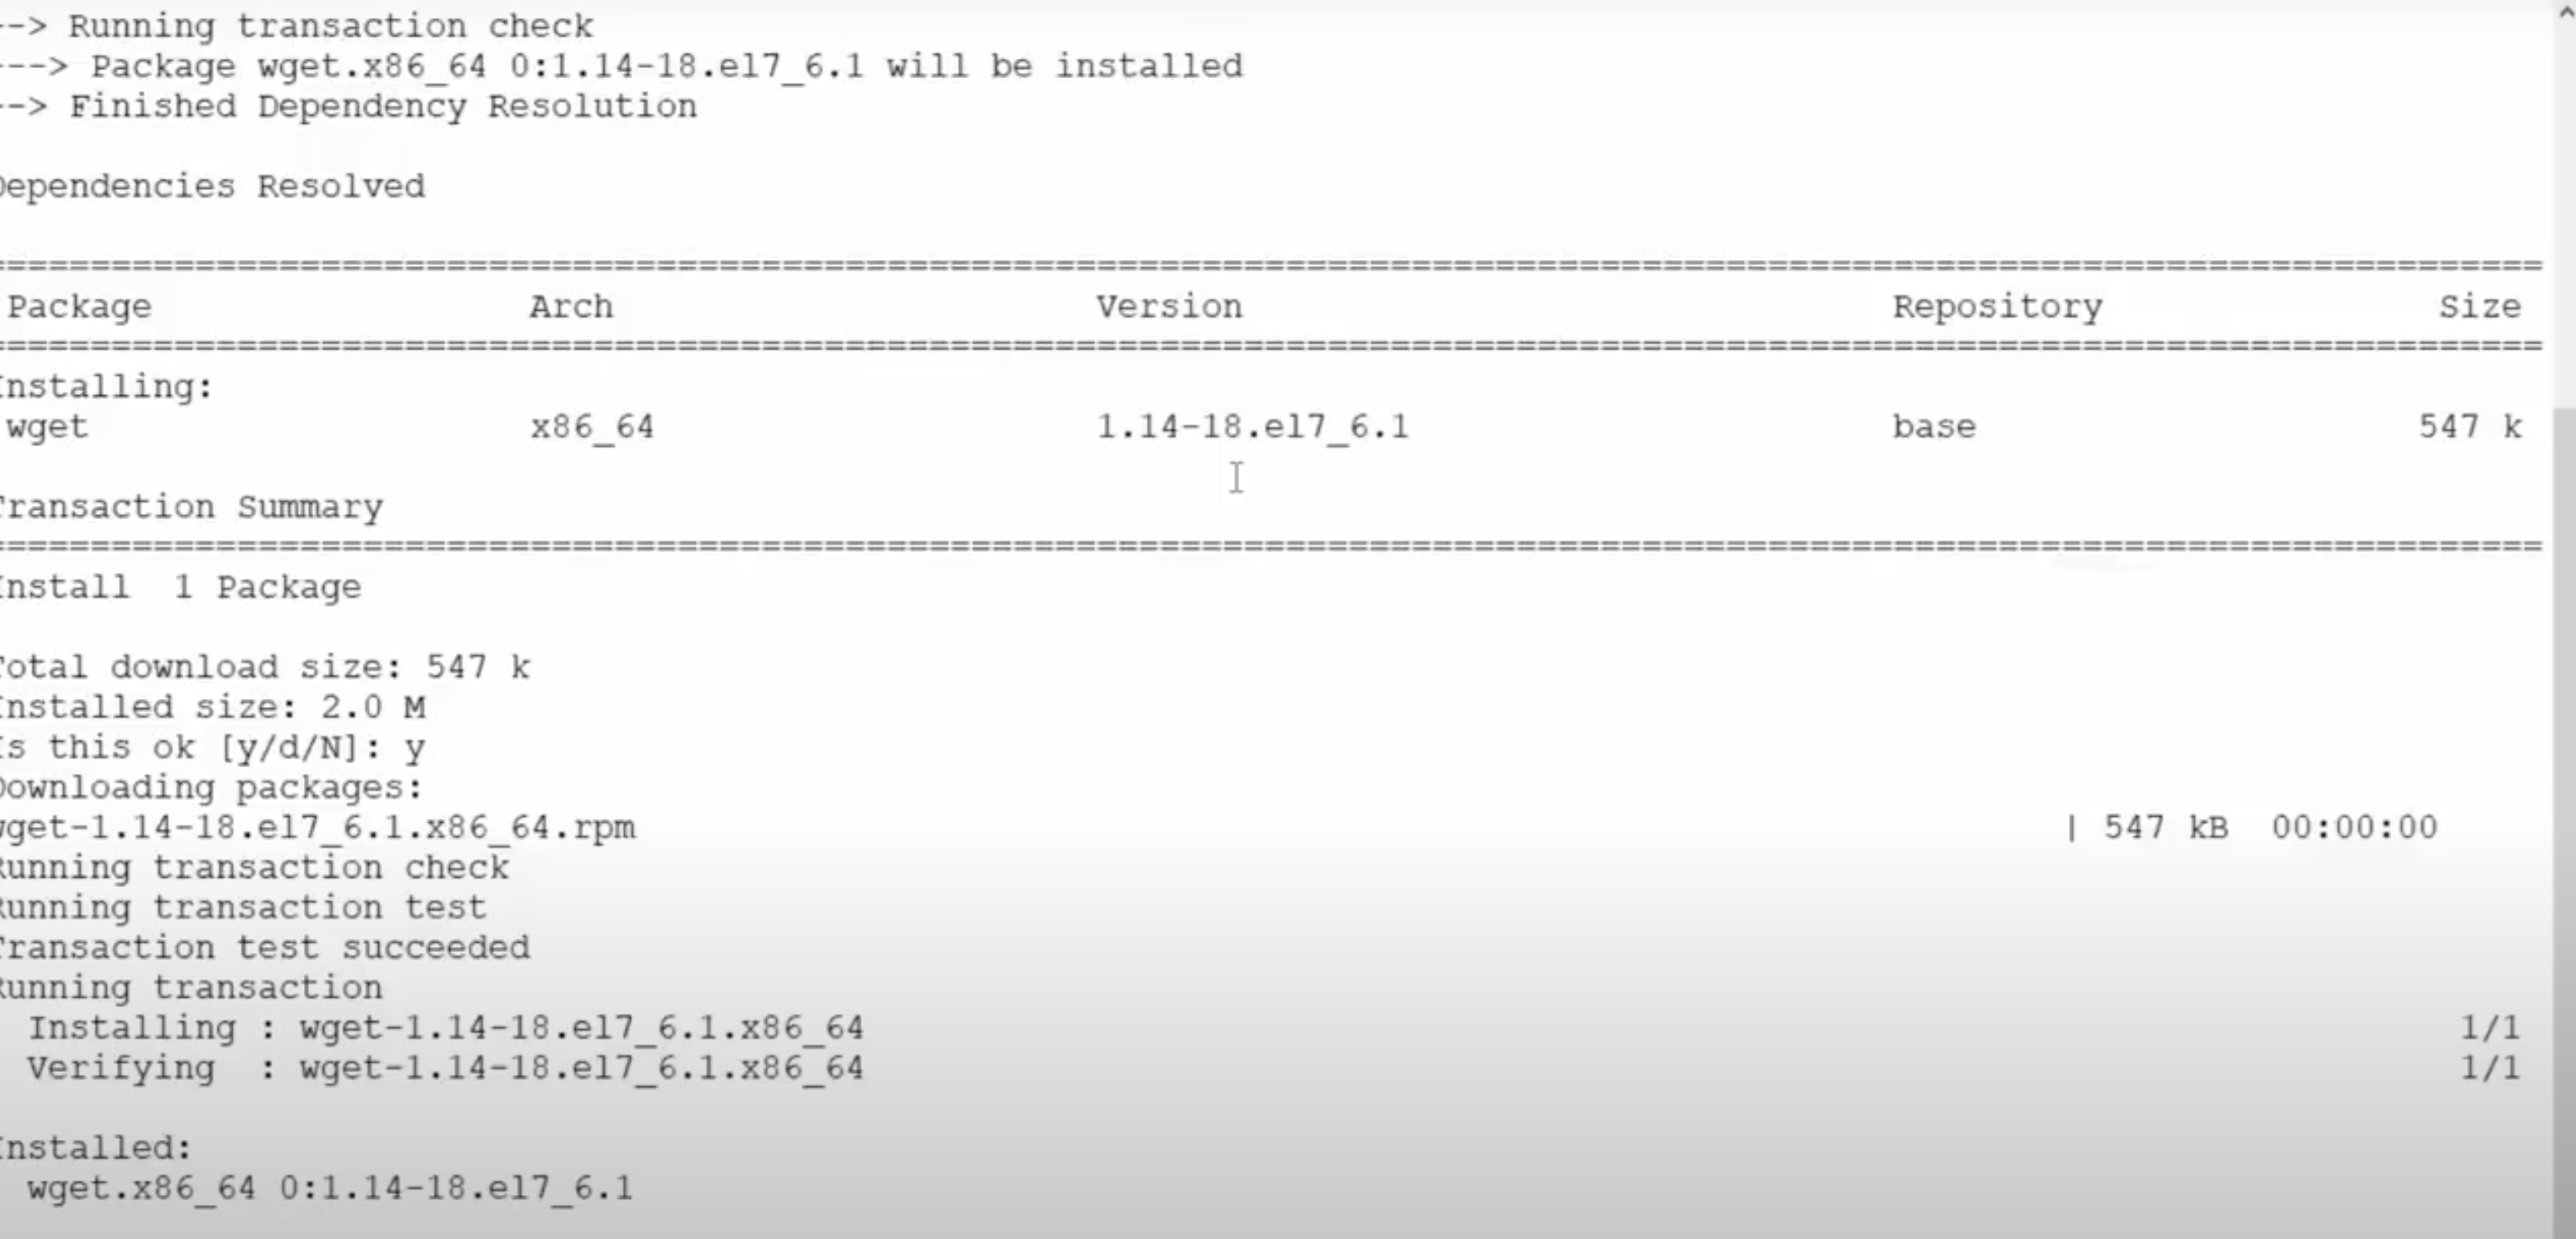
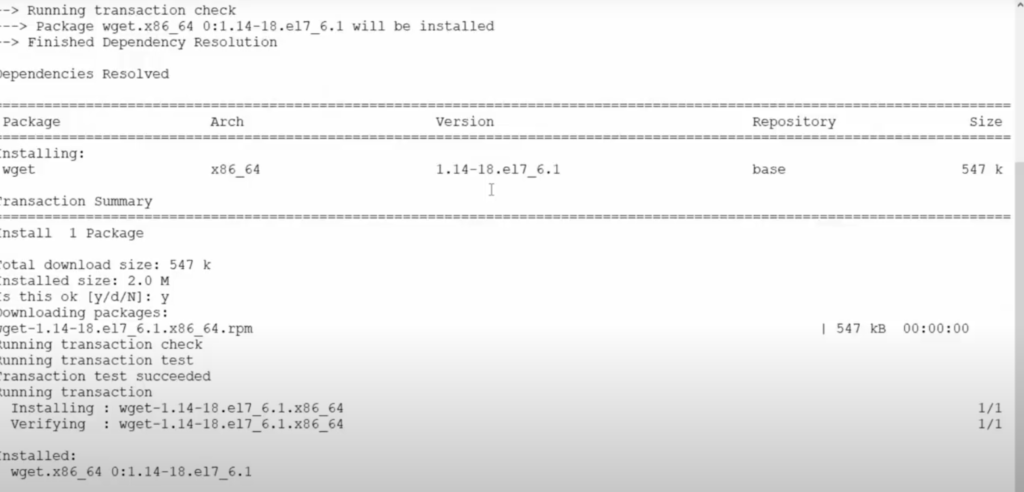
Step 1: yum install wget
Step 2
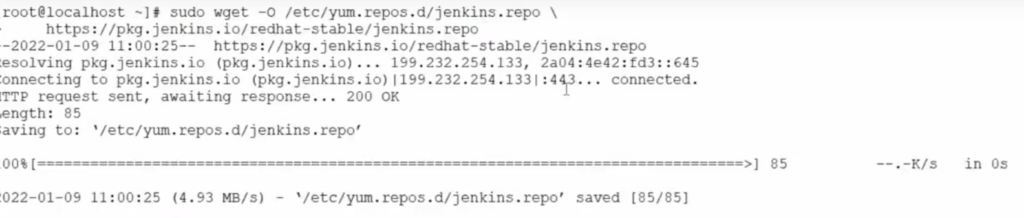
sudo wget -O /etc/yum.repos.d/jenkins.repo \
    https://pkg.jenkins.io/redhat/jenkins.repo
Step 3:
sudo rpm --import https://pkg.jenkins.io/redhat/jenkins.io-2023.key
sudo yum upgrade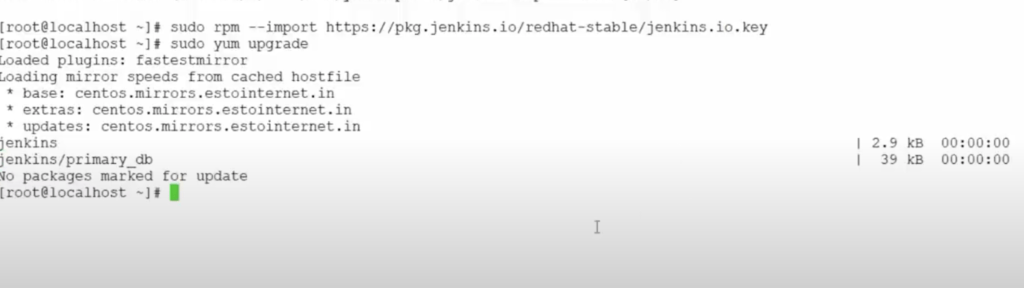
Step 4 :
sudo yum install fontconfig java-17-openjdk
Step 5 :
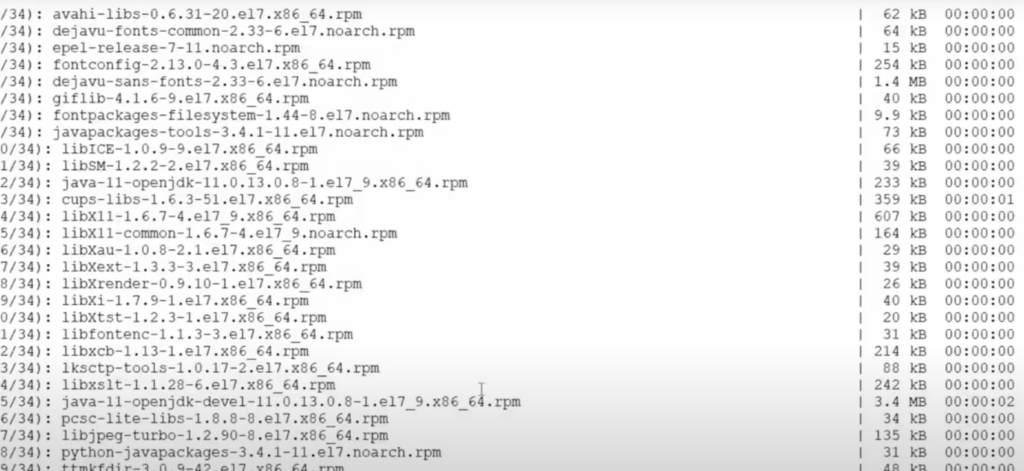
sudo yum install jenkinsStart Jenkins
You can enable the Jenkins service to start at boot with the command:
sudo systemctl enable jenkinsYou can start the Jenkins service with the command:
sudo systemctl start jenkinsYou can check the status of the Jenkins service using the command:
sudo systemctl status jenkins

Firewall --> sudo firewall-emd --permanent --zone=public --add-port=8080/tcp
Unlocking Jenkins
When you first access a new Jenkins instance, you are asked to unlock it using an automatically-generated password.
- Browse to
http://localhost:8080(or whichever port you configured for Jenkins when installing it) and wait until the Unlock Jenkins page appears.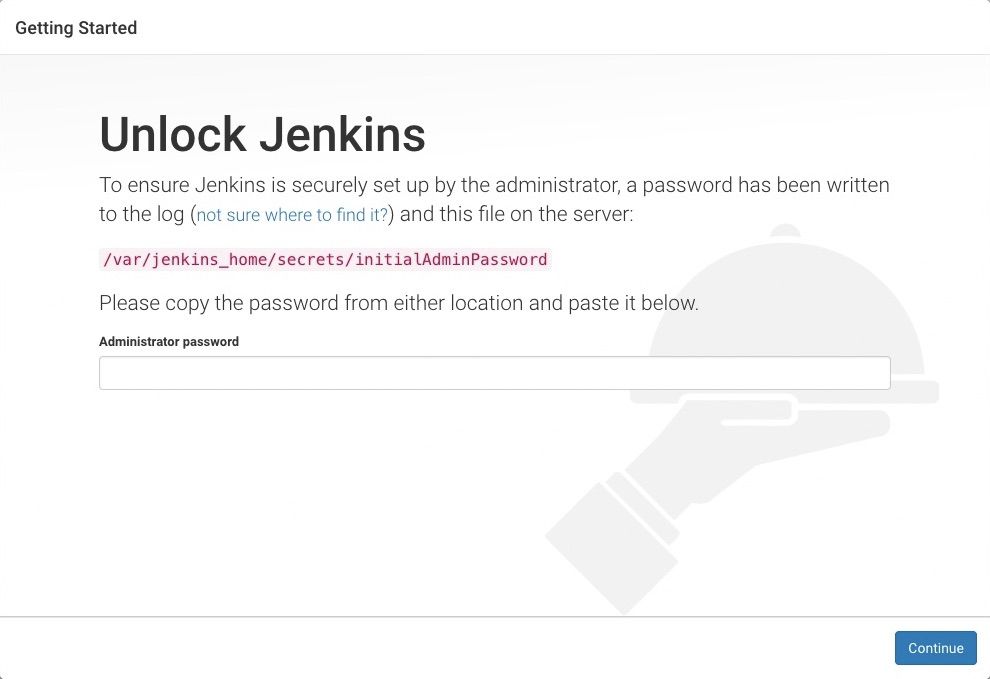
- From the Jenkins console log output, copy the automatically-generated alphanumeric password (between the 2 sets of asterisks).
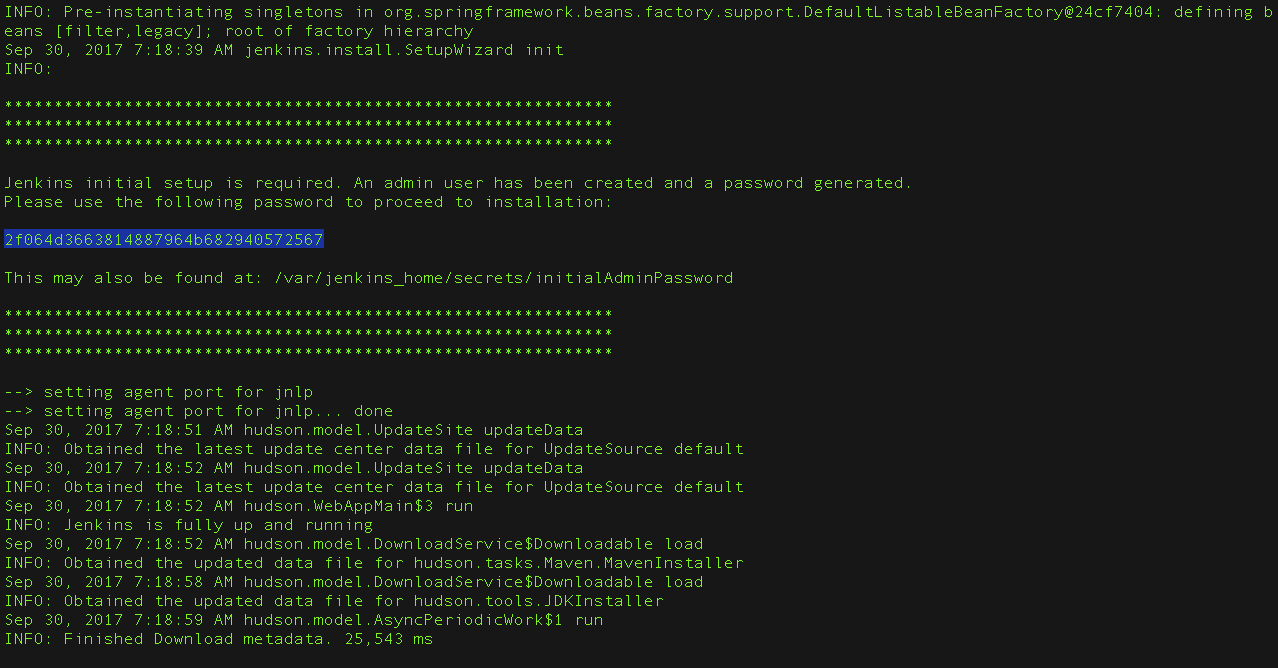
Note:- The command:
sudo cat /var/lib/jenkins/secrets/initialAdminPasswordwill print the password at console. - If you are running Jenkins in Docker using the official
jenkins/jenkinsimage you can usesudo docker exec ${CONTAINER_ID or CONTAINER_NAME} cat /var/jenkins_home/secrets/initialAdminPasswordto print the password in the console without having to exec into the container.
- The command:
- On the Unlock Jenkins page, paste this password into the Administrator password field and click Continue.
Note:- The Jenkins console log indicates the location (in the Jenkins home directory) where this password can also be obtained. This password must be entered in the setup wizard on new Jenkins installations before you can access Jenkins’s main UI. This password also serves as the default administrator account’s password (with username “admin”) if you happen to skip the subsequent user-creation step in the setup wizard.
Customizing Jenkins with plugins
After unlocking Jenkins, the Customize Jenkins page appears. Here you can install any number of useful plugins as part of your initial setup.
Click one of the two options shown:
- Install suggested plugins – to install the recommended set of plugins, which are based on most common use cases.
- Select plugins to install – to choose which set of plugins to initially install. When you first access the plugin selection page, the suggested plugins are selected by default.
| If you are not sure what plugins you need, choose Install suggested plugins. You can install (or remove) additional Jenkins plugins at a later point in time via the Manage Jenkins > Plugins page in Jenkins. |
The setup wizard shows the progression of Jenkins being configured and your chosen set of Jenkins plugins being installed. This process may take a few minutes.
Creating the first administrator user
Finally, after customizing Jenkins with plugins, Jenkins asks you to create your first administrator user.
- When the Create First Admin User page appears, specify the details for your administrator user in the respective fields and click Save and Finish.
- When the Jenkins is ready page appears, click Start using Jenkins.
Notes:- This page may indicate Jenkins is almost ready! instead and if so, click Restart.
- If the page does not automatically refresh after a minute, use your web browser to refresh the page manually.
- If required, log in to Jenkins with the credentials of the user you just created and you are ready to start using Jenkins!
![]()